Setting the Time Zone on Grandstream Phones
Overview
This article provides step-by-step instructions for configuring the date, time, and time zone on Grandstream wireless and desk phones. Ensuring the correct time zone is set is important for accurate call logs, system synchronization, and display information.
Wireless Phones (WP8x6 Series)
About Date and Time
- The date and time are displayed on the idle screen.
- By default, the phone retrieves time automatically from an SNTP (Simple Network Time Protocol) server.
- If the phone cannot reach the SNTP server, you must manually configure the date and time.
- Supported time formats:
- 12-hour format
- 24-hour format
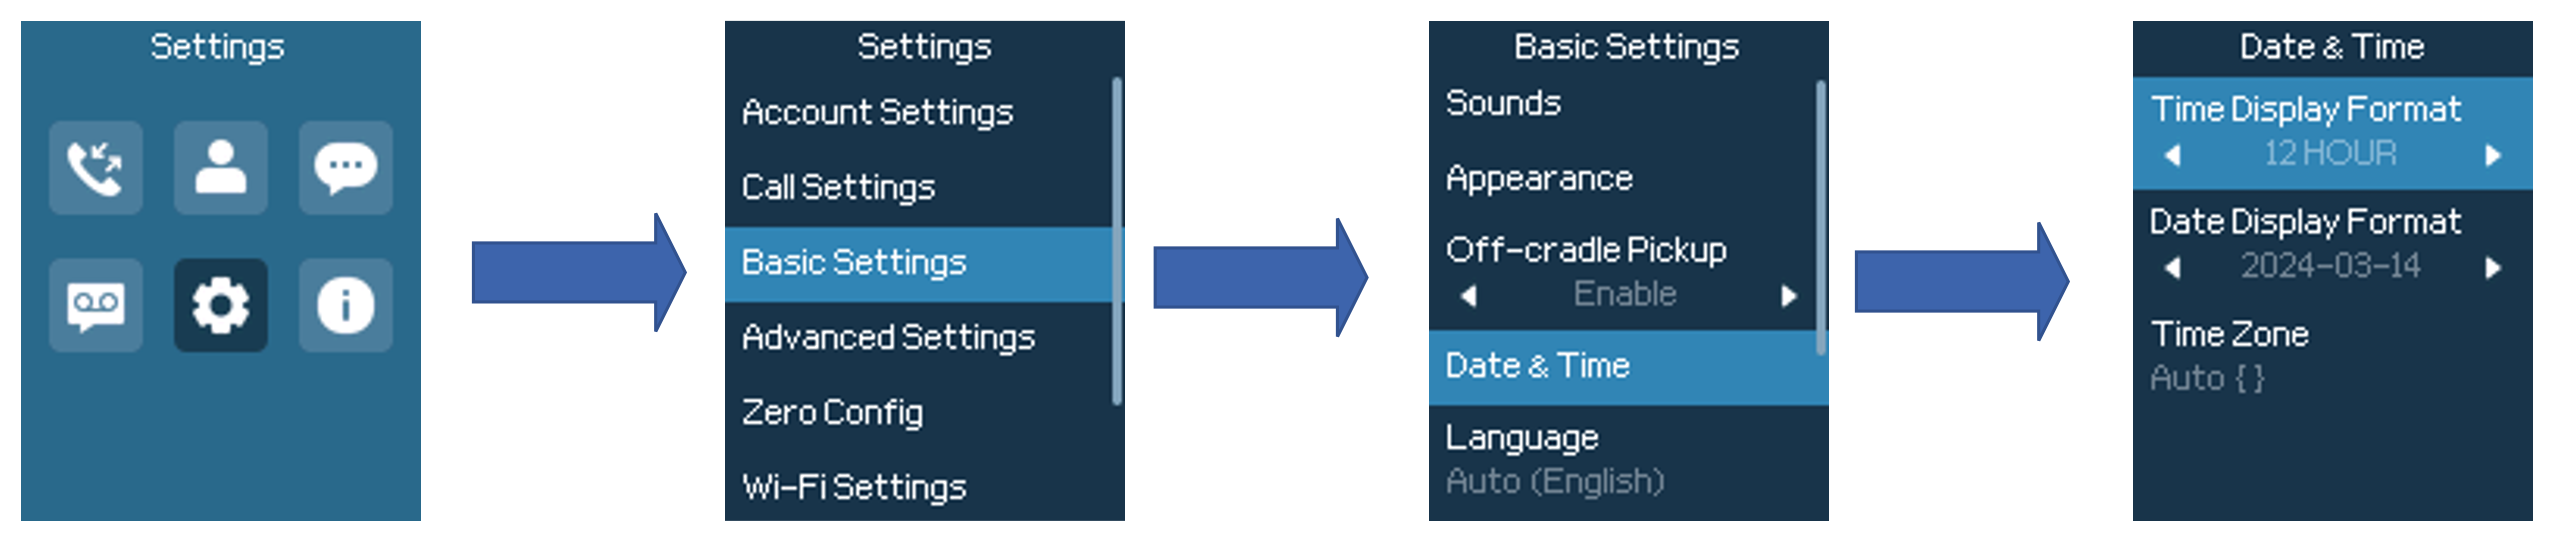
Steps to Configure Date and Time Manually
- Press the Menu button to open the operation menu.
- Use the arrow keys to navigate to:
Settings → Basic Settings → Date and Time - Adjust the following as needed:
- Date
- Time
- Time format (12h or 24h)
- Date format
- Change Time Zone from Auto to your desired time zone.
- Press the Onhook key to apply and save your changes.
Grandstream Desk Phones
Accessing the Menu
- When the phone is idle, press the round MENU button to enter the configuration menu.
- Use the arrow keys (up/down/left/right) to navigate through options.
- Press the MENU button or “Select” softkey to confirm a selection.
Steps to Change Time Zone on Desk Phones
- Press the MENU button.
- Navigate to:
Preferences → Date & Time → Time Settings - Locate the Time Zone setting.
- Change from Auto to the desired time zone.
- Save or confirm your selection.
